
Learn how easy it is to keep your home water filter maintained to ensure your water tastes clean and refreshing. In this continuing series on home maintenance, we will walk you through all the steps involved in changing your filter. Check out the video above for more from Handyman Shane!
How often should I change my water filter?
The short answer is every three months.
However, if your water quality is poor then you may need to change it more often. Water quality can vary widely from city-to-city and well-to-well.
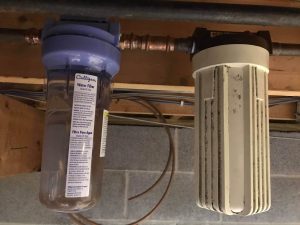
Another reason to change your water filter more often is if you have a higher demand on your water usage. The type of water filter shown is recommended for a 3-4 person household. If you have extended company or fill your pool with your hose or host the neighborhood slip-and-slide, then you may go through filters faster.
Note: the EPA warns that “Filters collect germs from water, so someone who is not immunocompromised should change the filter cartridges. Anyone changing the cartridges should wear gloves and wash hands afterward.”
What do I need?
- New filter
- Water filter wrench
- Bucket
How to replace your water filter
- Shut off your water valve at the main or prior to the cartridge housing. Some filter housings include their own shut-off capability. Either way, you definitely want to make sure that water is off.
- Open a faucet to allow the rest of the water in the pipe to drain. Preferably the lowest standing sink in the house. Some housings have an air purge button – if you hold this down as the water drains in the sink it’ll speed the process. Once the water has run dry, you’re ready to proceed.
- Place or hold a bucket underneath the filter housing to catch any residual water that may splash out.
- Use your water filter wrench and remove the housing. This may take some force as the housings have gaskets that hold them snugly in place. Don’t be afraid; properly installed pipes hold a lot of strength.
- Empty the housing. Pour the remaining water into your bucket and remove and discard the used filter.
- Insert the new filter. At the bottom of the housing, there is a tab that sticks up. The filter will have a matching hole on one end that fits over the tab.
- Replace housing using your wrench and hand tighten.
- Restore the water and check for leaks. If needed, tighten with your wrench. You may have some air in your lines so enjoy the surprise on your roommates’/family’s faces as they use various sinks around your house.
For more information on water filter parts, visit our webpage at: https://keithspecialty.com/water.treatment.htm
Keith Specialty Store is here to help you find what you need to get the job done. Our website makes it easy to search for the parts you need by number or description. If you have any questions, you can contact our highly knowledgeable staff at 800-705-8838.
This blog is part of an ongoing series helping show how accessible regular home maintenance is. You may also be interested in some of our other topics (below). Got any home maintenance subjects you’d like to learn more about? Let us know!